River Flattening
This tutorial describes how to edit a river in a Digital Surface Model (DSM).
Flowing water like rivers must be flattened into steps due to the changing
elevation of the water surface along the river course.
Prior to commencing a project perform the following steps.
Review the Getting Started tutorials to learn more about loading and
interacting with data using uniDEM.
This lesson will take approximately 10 minutes.
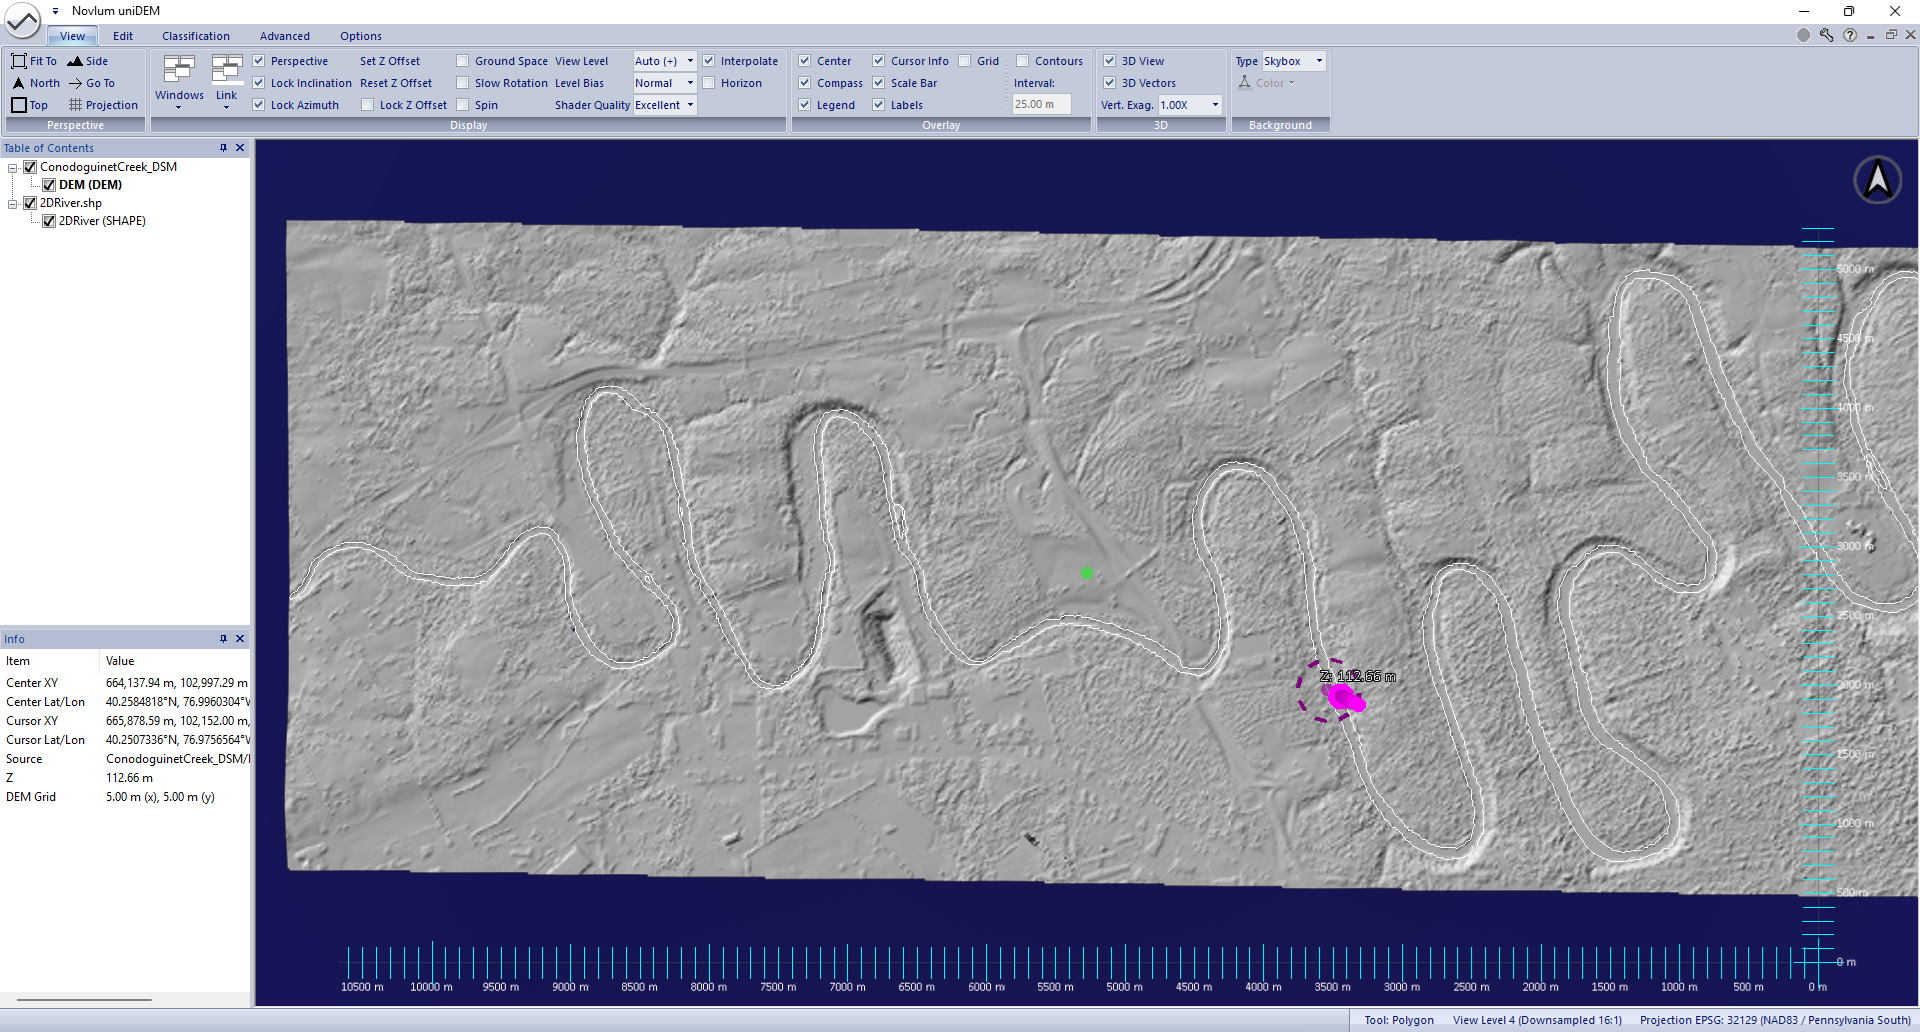
1. Load and View DSM
- Click uniDEMlogo → Load DEM
- Open ConodoguinetCreek_DSM.tif
- Display "ConodoguinetCreek_DSM" in the View
- Turn colors off in shader by clicking into view and press "H"
- Click uniDEMlogo → Load Shapes
- Open "2DRiver.shp"
- Display "2DRiver.shp" in the View
Help references:
Load DEM |
Load Shape |
Shader Color Scheme (H)
2. Classify Water from 2D Shapefile
Water identification can be done manually or shapefile polygons
can be used to create a selection and applied to a classification mask.
The Classification Mask is created to align spatially with the DSM being edited the first time a mask value is assigned.
- Within the Edit tab in the Selection panel, click the Load From File tool
- Select 2DRiver.shp to add all river pixels within the shapefile to the selection mask
- Within the Classification tab click the shortcut "2" for River classification
- When asked whether to create a new classification mask, click Yes to create a classification mask for the DEM
- Press Esc to clear the selection
- Click the CLASS mask in the ConodoguinetCreek_DSM dataset
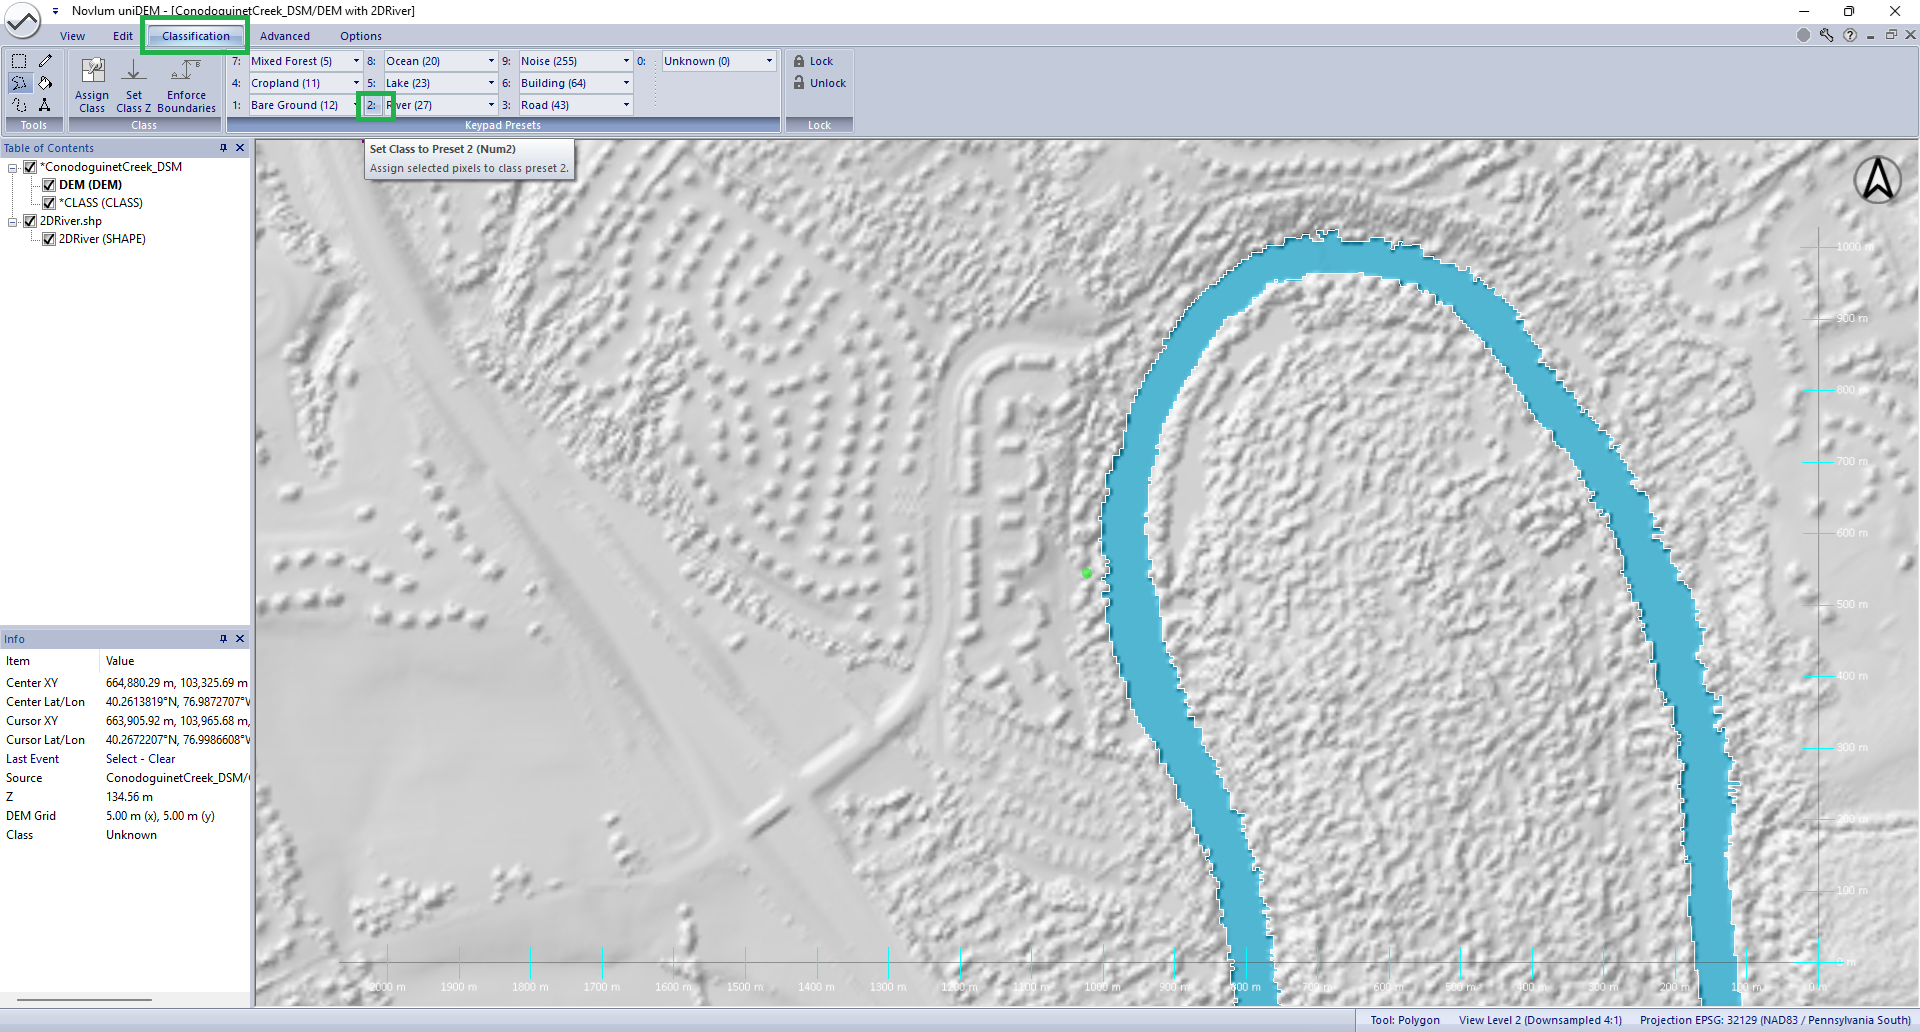
Observe: The River class is assigned within the intersecting pixels of ConodoguinetCreek_DSM and the 2DRiver.shp
Help references:
Load (Selection) From File |
Classification Shortcuts
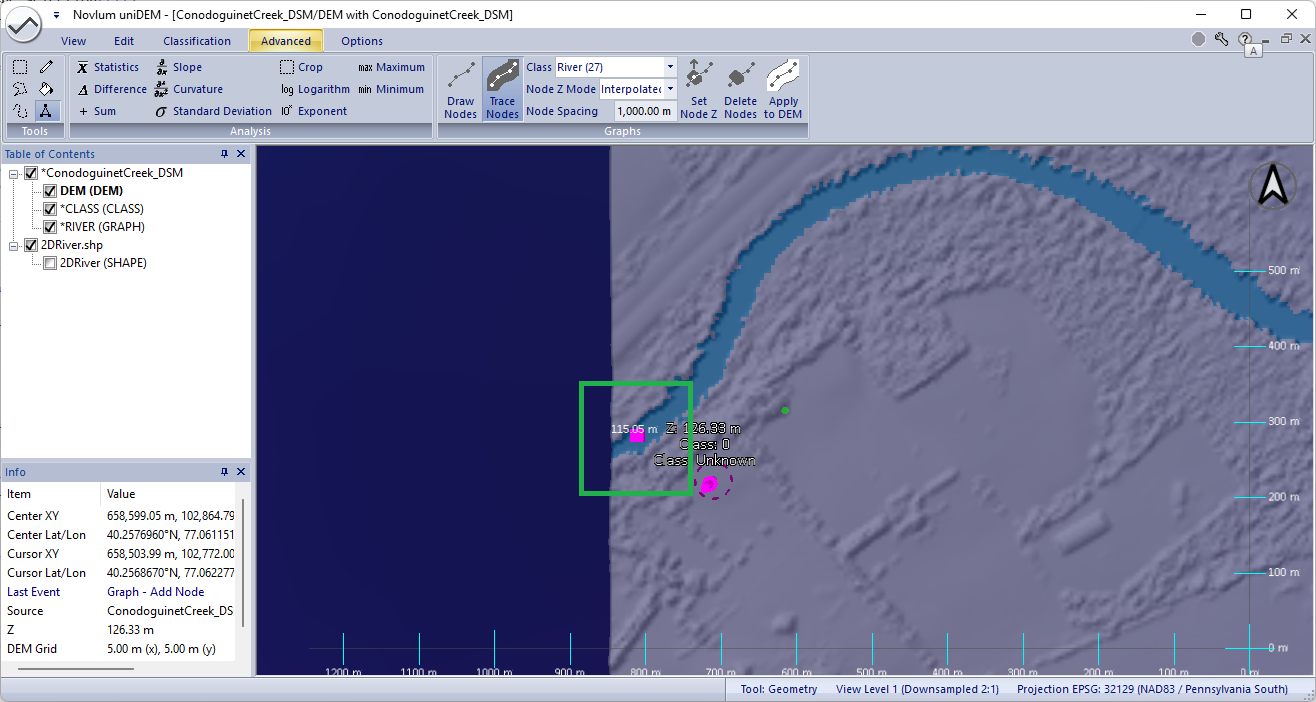
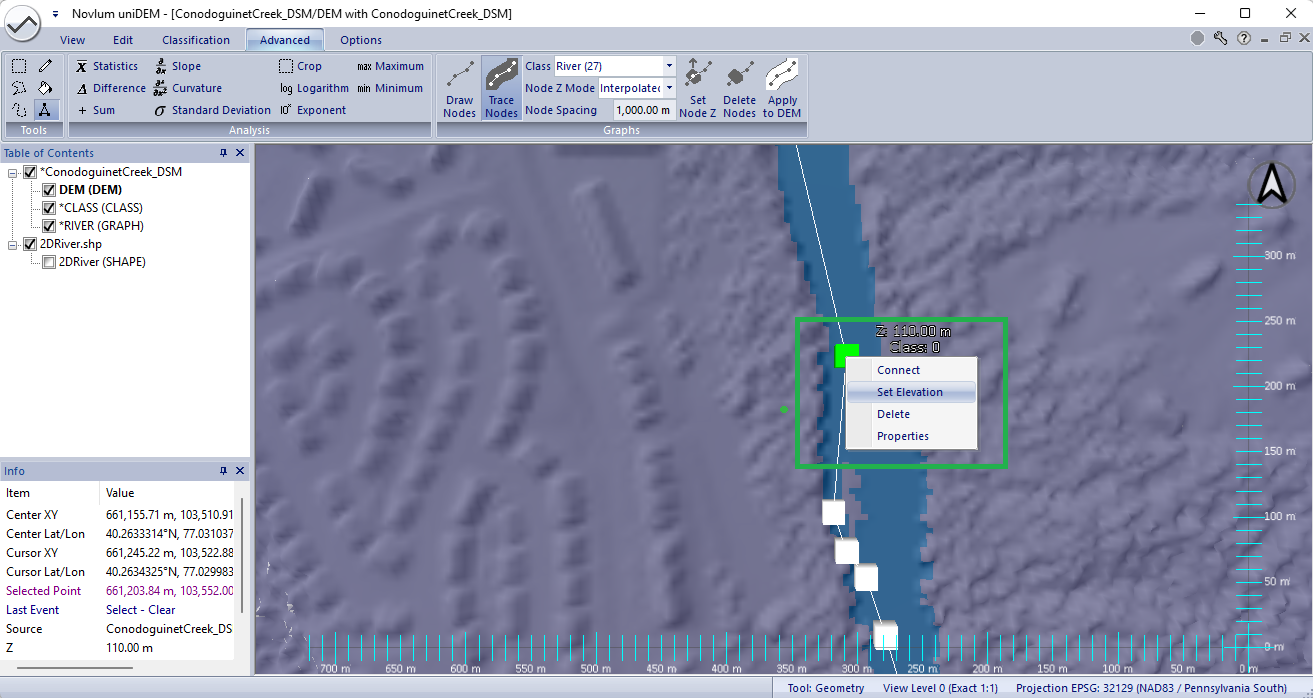
3. Create River Centerline
Flowing water like rivers and streams can be editing using river centerlines drawn manually or semi-automatically.
Start Collection
- Click 2DRiver.shp in the TOC to remove from the View
- Navigate to the western most portion of the river
- In the Advanced tab in the Graphs panel, click Trace In Nodes and select River in the class drop-down
- When asked whether to create a new river graph, click Yes to create a river graph for the DEM
- Press Shift + Left Click over a non-void pixel within the river to start the centerline
Note: The height of the node is taken from the DSM. If all water is void the elevation can be set manually.
End Collection
River centerlines can be collected between a start and end node saving time delineating the river.
- Navigate to the eastern most portion of the river
- Press Shift + Left Click over a non-void pixel nearest the end of the river
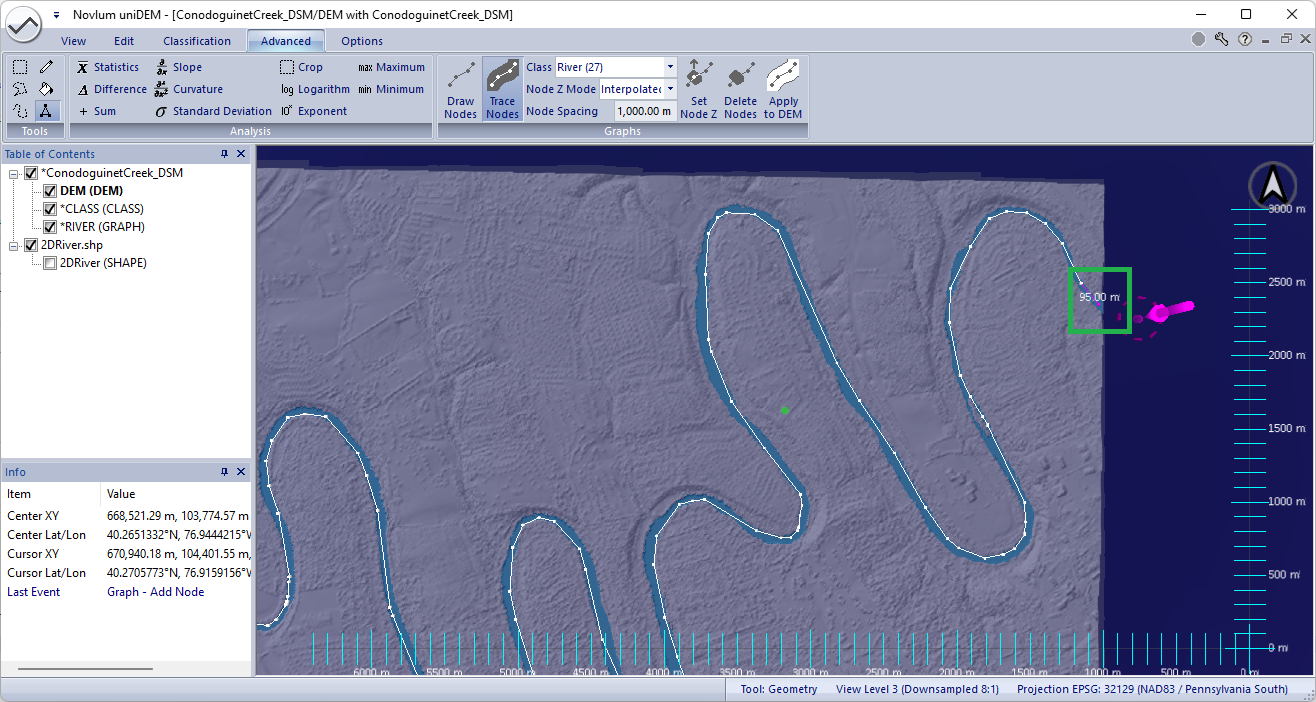
Notes:
- The centerline is delineated from the first node to the last node along the river classification
- The height of the last node is taken from the DSM. If all water is void the elevation can be set manually
- All elevations within the River shape are intepolated between the first and last node
Review and Control River Elevations Along Centerline
River slopes vary along the coarse of flow. To ensure that river elevations do not "float" above the shoreline it is recommended
that the elevation of some of nodes along the river coarse are set.
In some instances such as when a river has been void filled the river must be lowered below neighboring tree heights.
- Working from the western portion of the river (top to bottom)locate nodes intermittently that are over non-void river pixels
- Mouse over the node and nearby non-void water heights. If they are close to one another continue down the river
- When the centerline height does deviate from the river perform the following:
- Press Shift + Right Click over the node to be changed
- Select Set Elevation
- Select Fixed for the Z mode
- Enter the new height for the node
- Repeat as required
Notes:
- All elevations within the River shape are intepolated between the manually set elevation nodes
- The centerline can be applied (below) and this step can be revisited as needed.
Help references:
Select By Class |
Clean Up |
Classification Shortcuts
4. Flatten Water
Rivers must be made to flow downhill.
- Press Ctrl-A to select all pixels
- In the Advanced tab in the Graphs panel, click Apply to DEM
- Select Classification as the constraint
- Select 27: River as the class to use when modifying
- Click OK to use 1000m as the maximum distance
- Click OK to use 0m as the step size
- Press Esc to clear the selection
Observe: All pixels classified as River are edited and no longer contain void.

Help references:
Select By Class |
Set To |
Make Void (V) |
Perimeter Void Fill
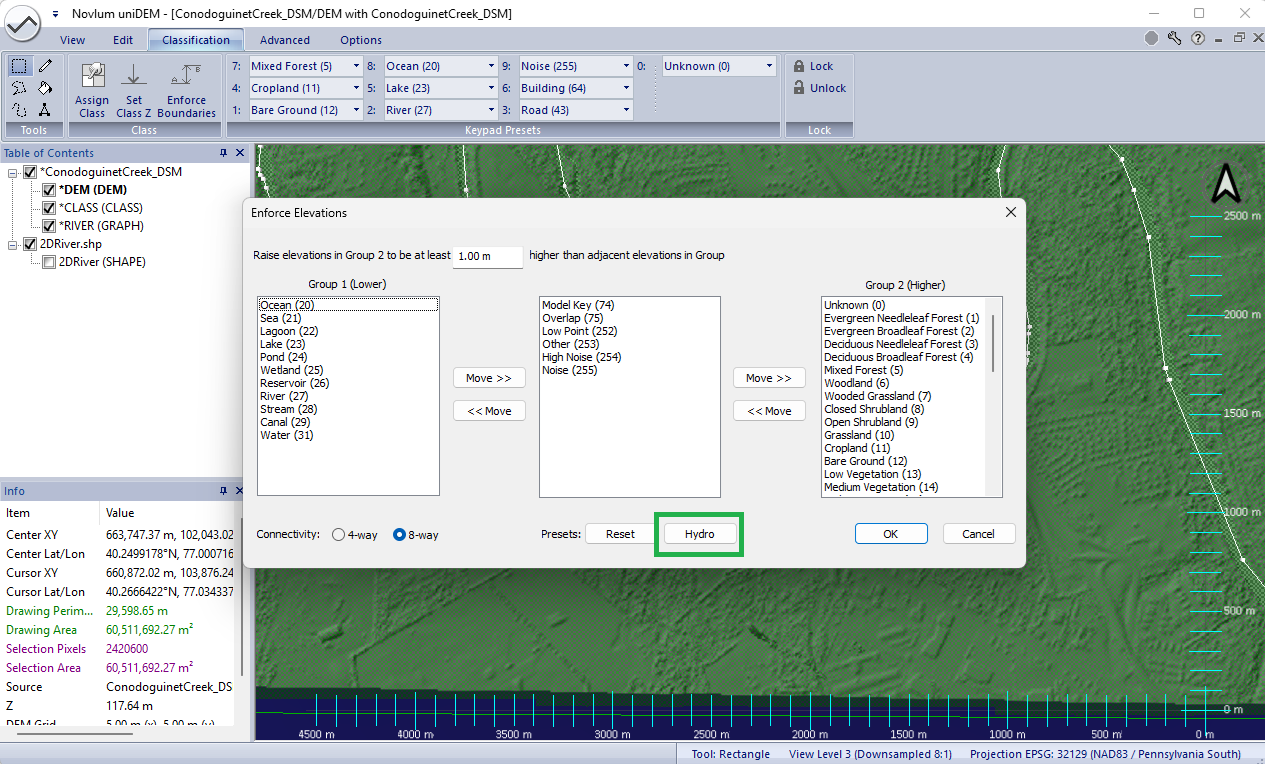
5. Adjust Shorelines
Many derivative products such as contours and flood modelling require land to be equal to or higher than neighbouring water pixels.
- Press Ctrl-A to select all pixels
- Within Classification tab click Enforce Boundaries
- Enter 1.0 raise all elevations by 1.0m in Group 2 (land types) is lower than Group 1
- Click the Hydro preset button to separate groups 1 and 2
- Click OK to apply the shoreline corrections
- Hit Esc key to clear the selection mask
Observe: All pixels that are of class Unknown are now equal to or higher than the height of the Ocean
Help references:
Select By Class |
Enforce Boundaries