Water Flattening
uniDEM Water Flattening
This tutorial describes how to identify, classify and flatten water which often has height errors or is missing (void) from most sensors
using ancillary imagery.
Prior to commencing a project perform the following steps.
Review the Getting Started tutorials to learn more about loading and
interacting with data using uniDEM.
This lesson will take approximately 10 minutes.
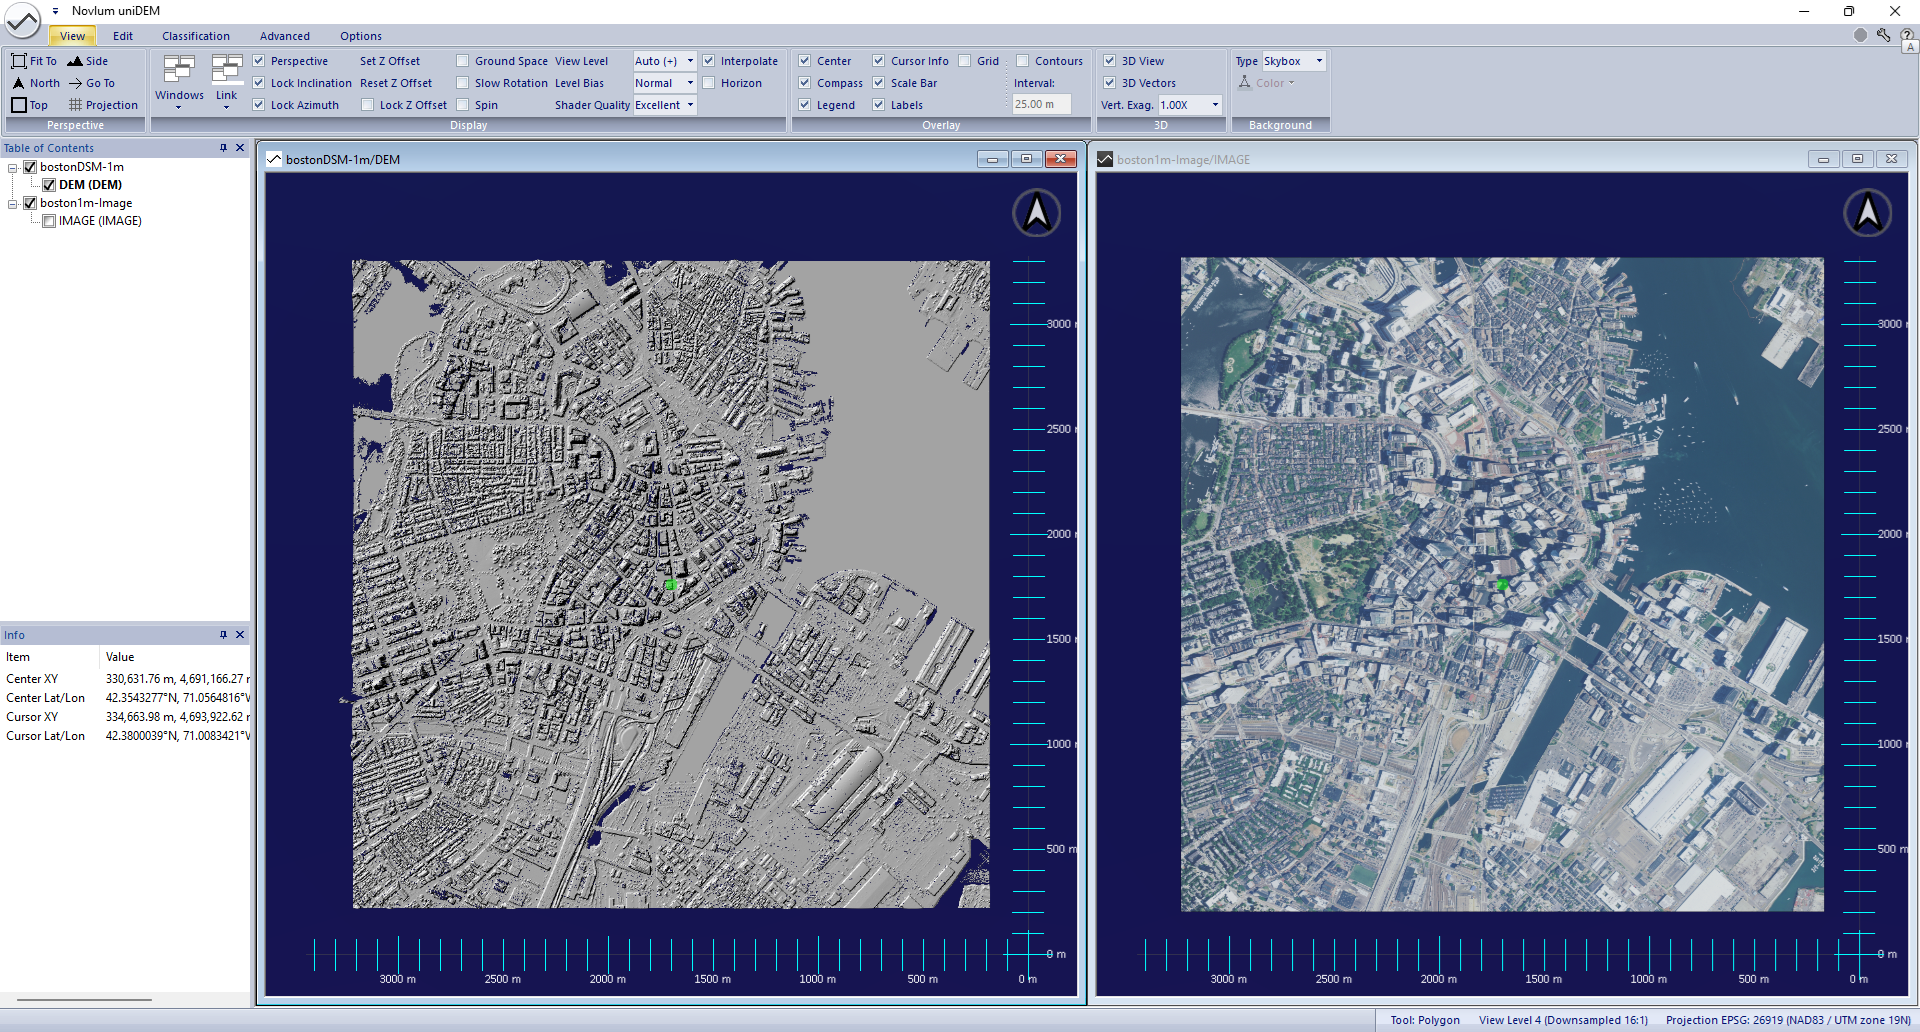
1. Load and View DSM
- Click uniDEMlogo → Load DEM
- Open bostonDSM-1m.tif
- Display "bostonDSM-1m" in the View
- Turn colors off in shader by clicking into view and press "H"
- Click uniDEMlogo → Load Image
- Open boston1m-Image.tif
- Press Ctrl-N to make a new View
- Press Ctrl-T to align Views
- Click into right view and display boston1m-Image
- Select bostonDSM-1m
Help references:
Load DEM |
Load Image |
New Window (Ctrl-N) |
Tile Windows (Ctrl-T)
2. Classify Water
Water identification and flattening is required to ensure consistent elevations and to fill missing data from the collection
process as required by the DEM specification.
The Classification Mask is created to align spatially with the DSM being edited the first time a mask value is assigned.
Flood Fill using Imagery
- Press "F" to enable the Flood Fill tool
- Flood fill options can be configured in the Edit tab in the the Flood Fill panel.
- Mouse over the water visible in the orthophoto, hold Shift + Left Click
- Within 1000m of the pixel click water is selected
- Continue clicking other water areas until most of the water is selected
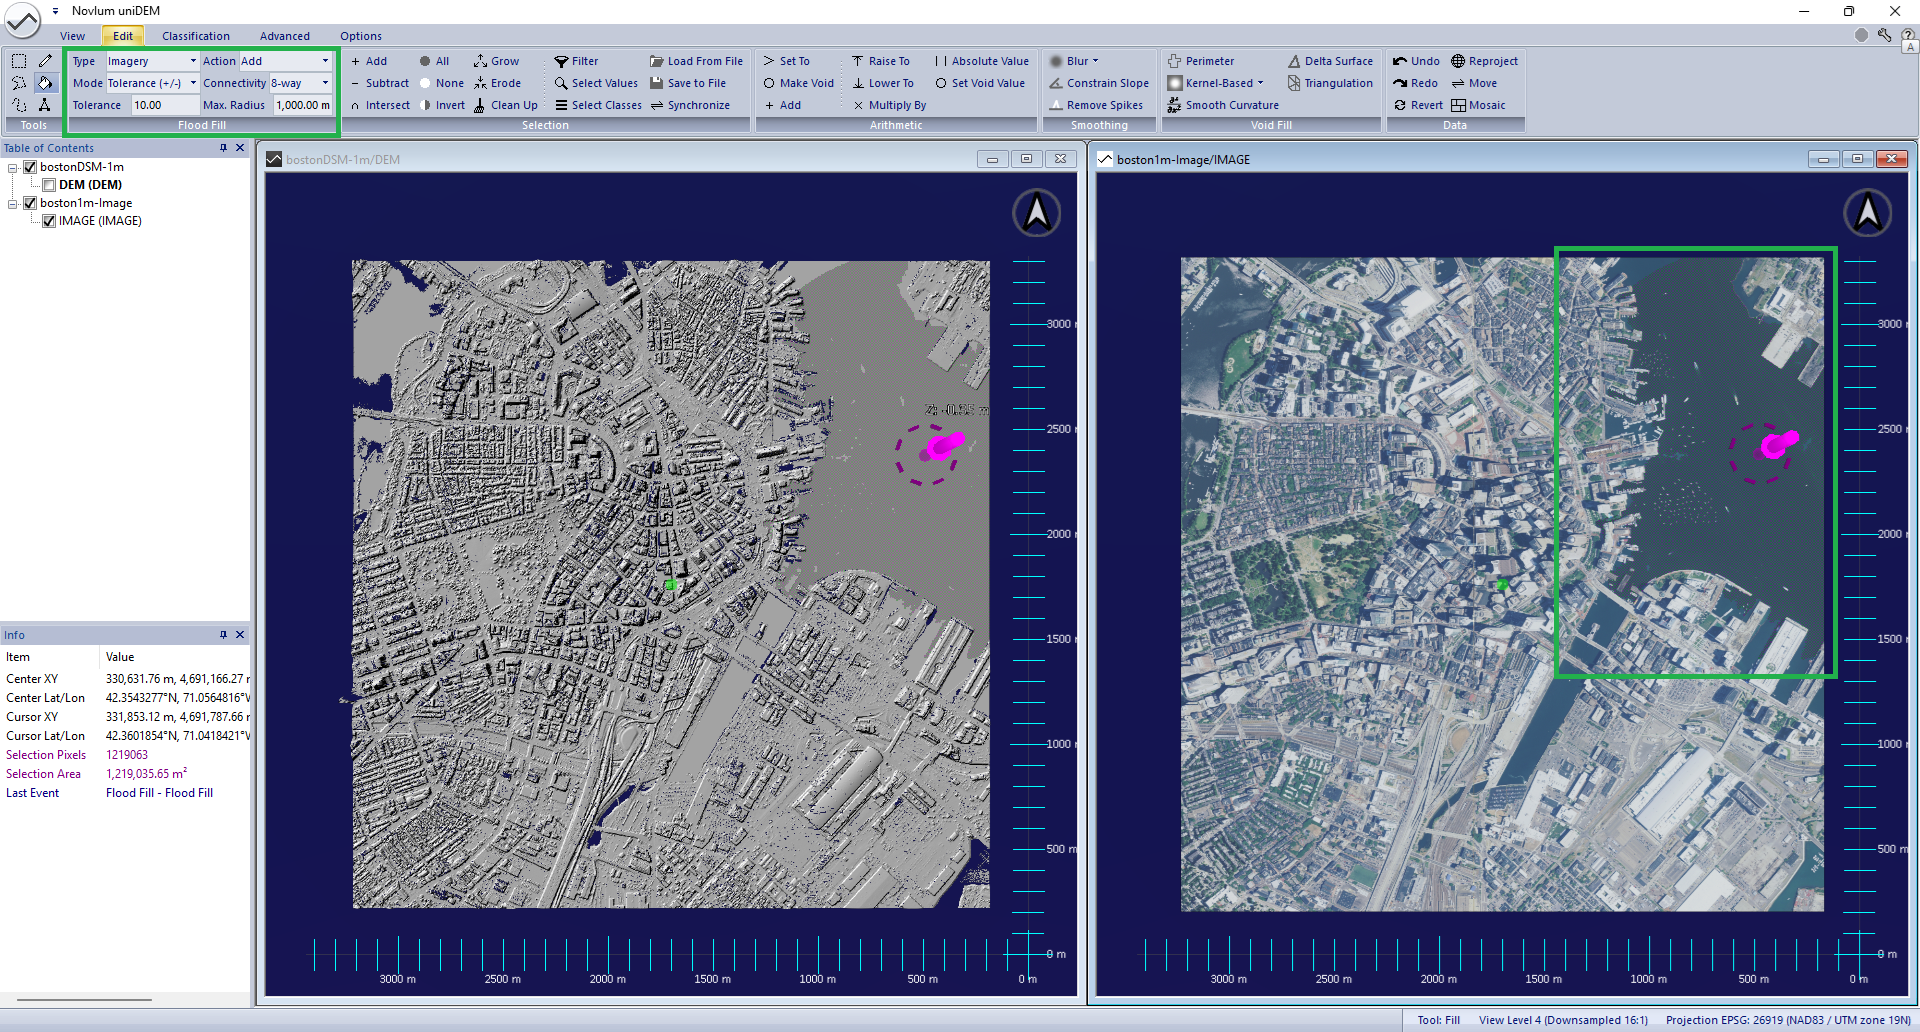
Assign Selection to Water
- In the Classification tab Click 8 (Ocean)
- Click Yes to create a new CLASS mask
- Hit Esc key to clear the selection mask
- Click into the left View
- Check the CLASS layer in the bostonDSM-1m dataset
Observe: The class mask displays classifications for Ocean (blue) and Unknown (gray) over the DEM.

Help references:
Flood Fill |
Flood Fill Options |
Classification Shortcuts
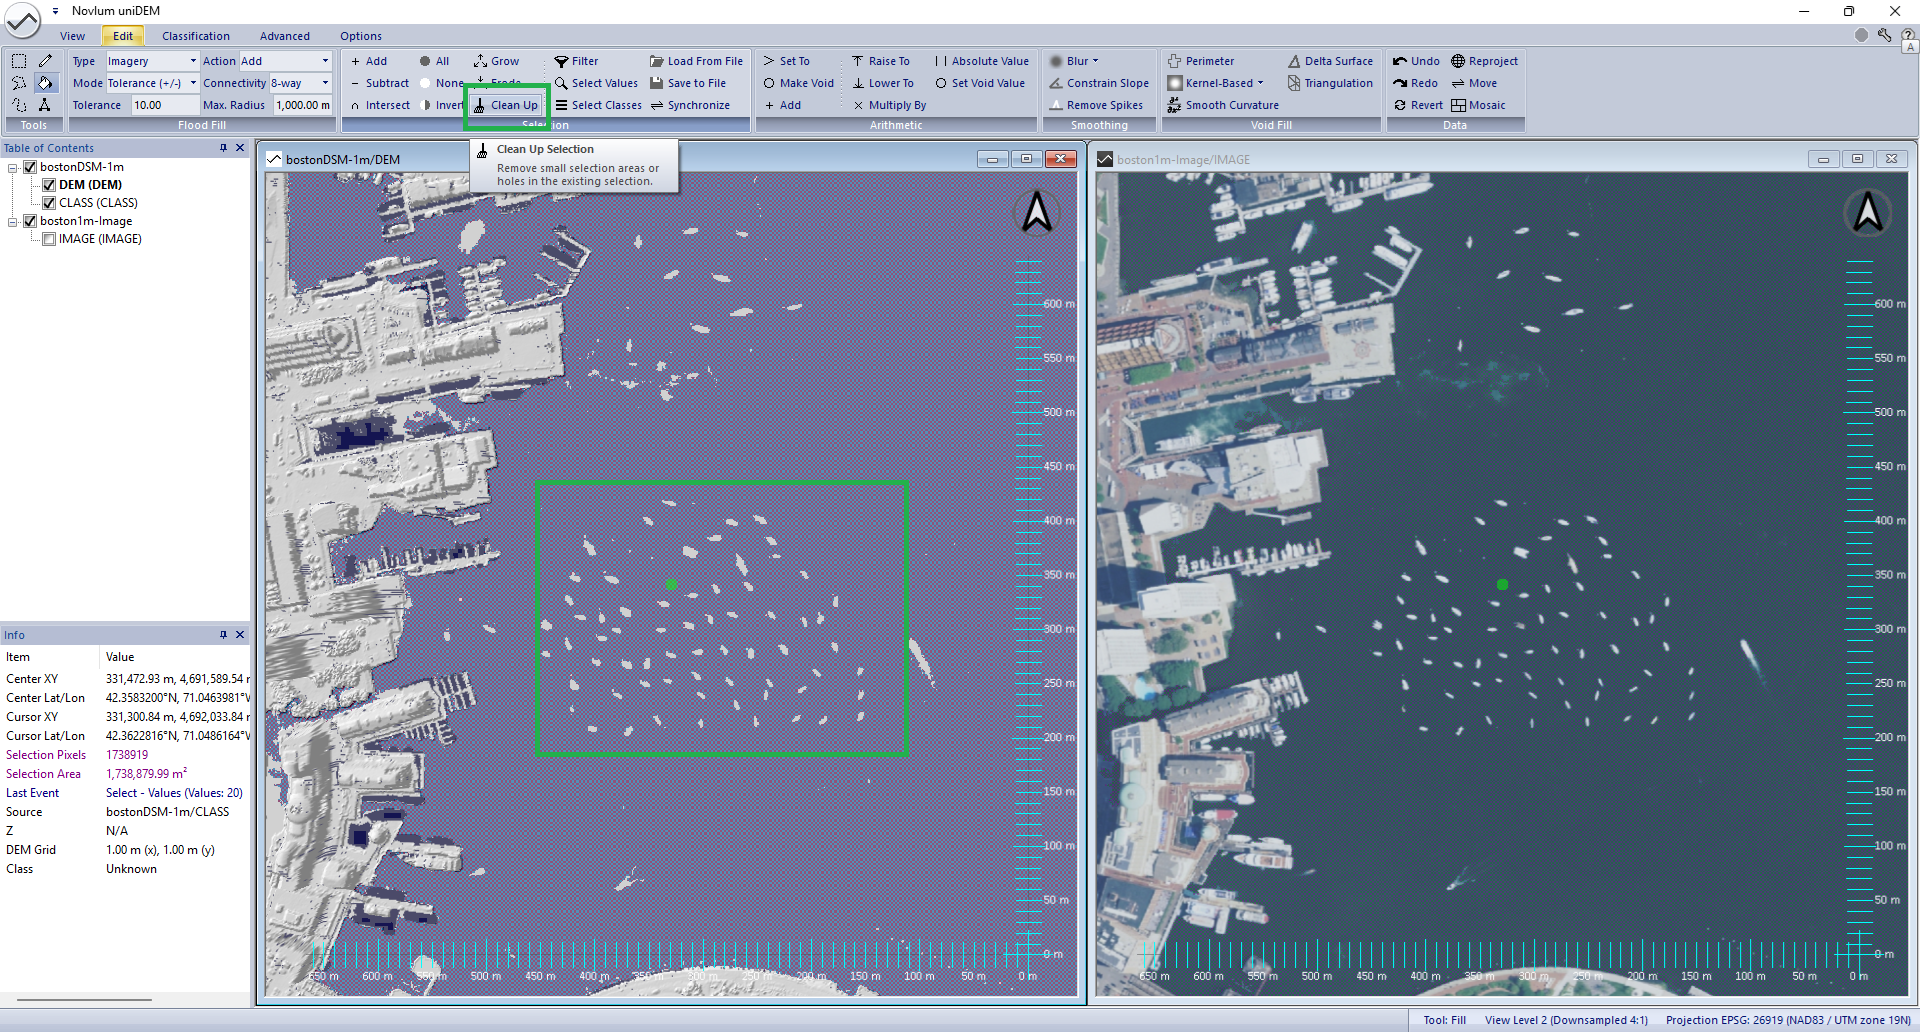
3. Clean-up Classification
Some water regions will contain features that do not match the selection such as waves, boats and small land.
If completely surrounded by water these feature can be removed to "clean up" the water classification.
- In the Edit tab in the Selection panel, click Select By Class
- Select the bostonDSM-1m dataset
- Select Ocean (20) classification
- In the Edit tab in the Selection panel, click Cleanup
- Select "Remove small holes"
- Select "8-way" connectivity and click OK
- Enter "500" to remove any holes in the selection <500m2
- In the Classification tab click 8 (Ocean)
- Hit Esc key to clear the selection mask
Observe: The boats within the orthoimage are added to the Ocean classification.
Help references:
Select By Class |
Clean Up |
Classification Shortcuts
4. Flatten Water
Standing water such as an Ocean or Lake need to be edited to a single elevation.
Water can be set manually or as a function of shoreline height. Both methods are presented.
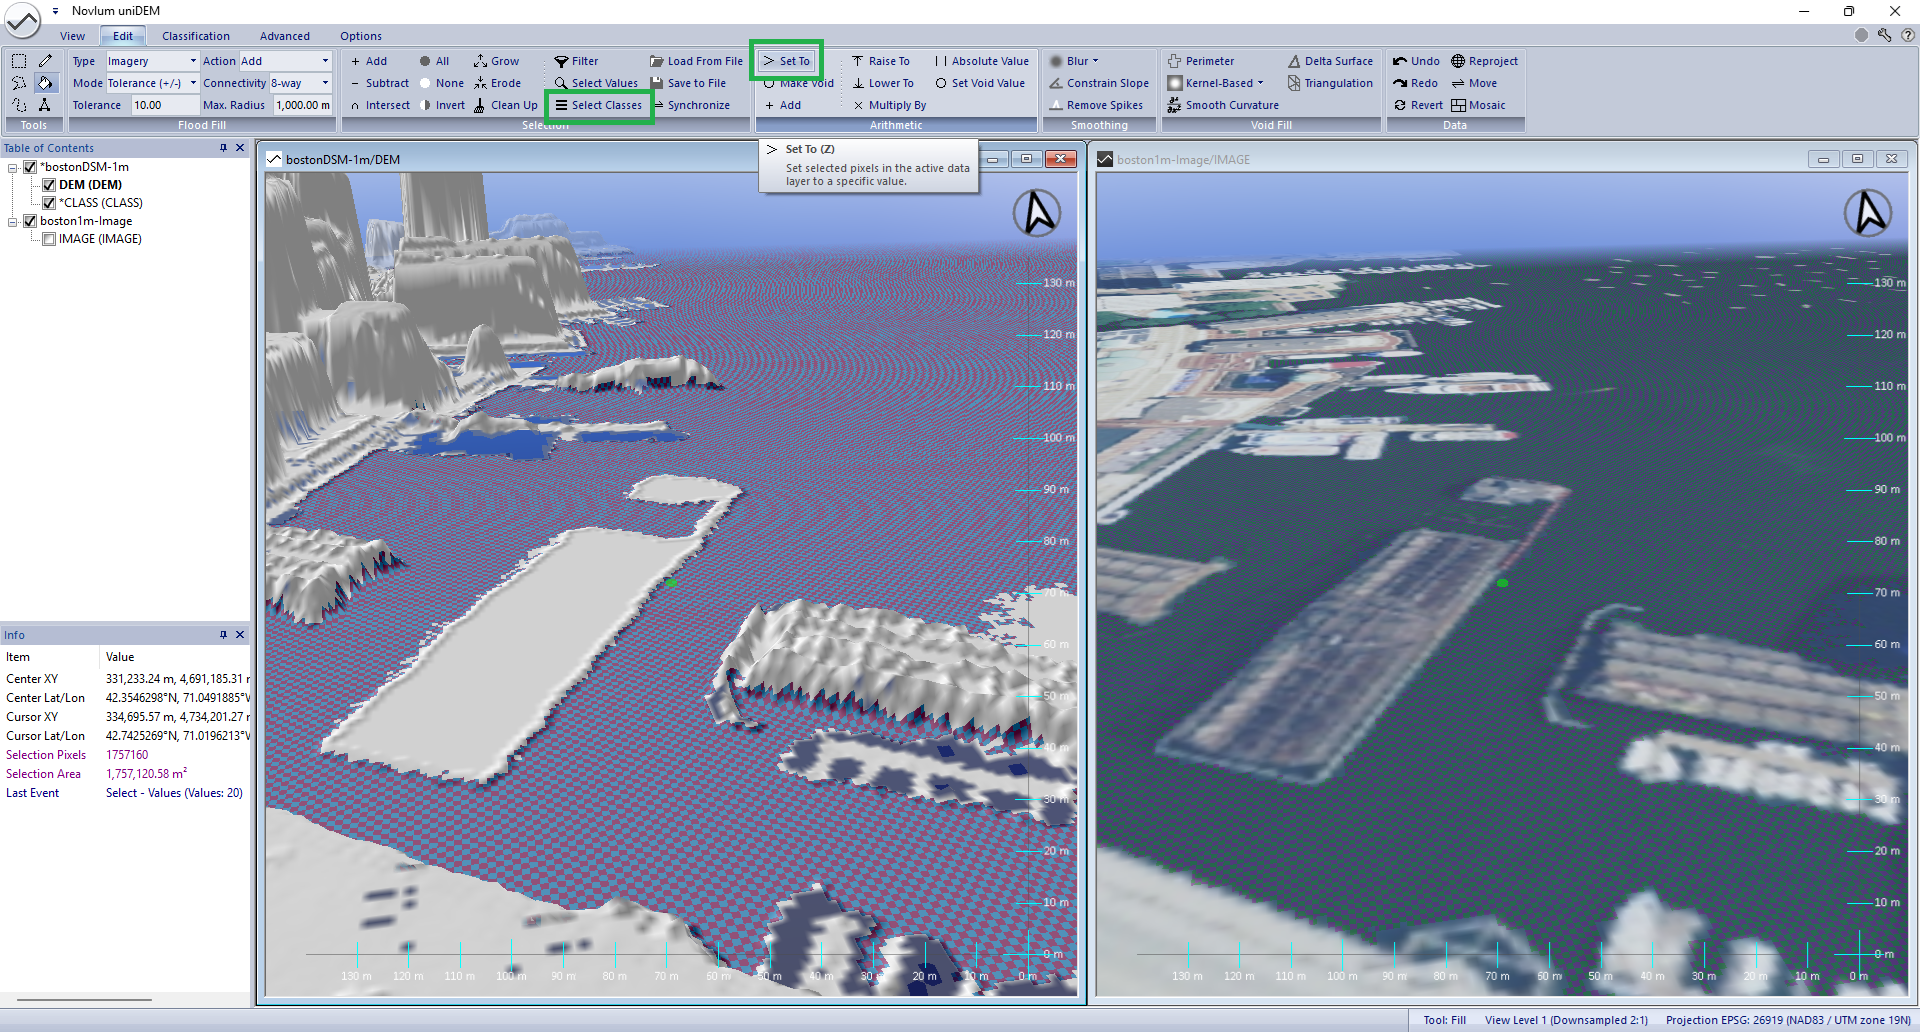
Manually Set Water Height
- In the Edit tab in the Selection panel, click Select By Class
- Select the bostonDSM-1m dataset
- Select Ocean (20) classification
- In the Edit tab in the Arithmetic panel, click Set To
- Enter 0 (m) to set all selected Ocean to 0m
- Hit Esc key to clear the selection mask
Observe: All pixels classified as Ocean are set to an elevation of 0m.
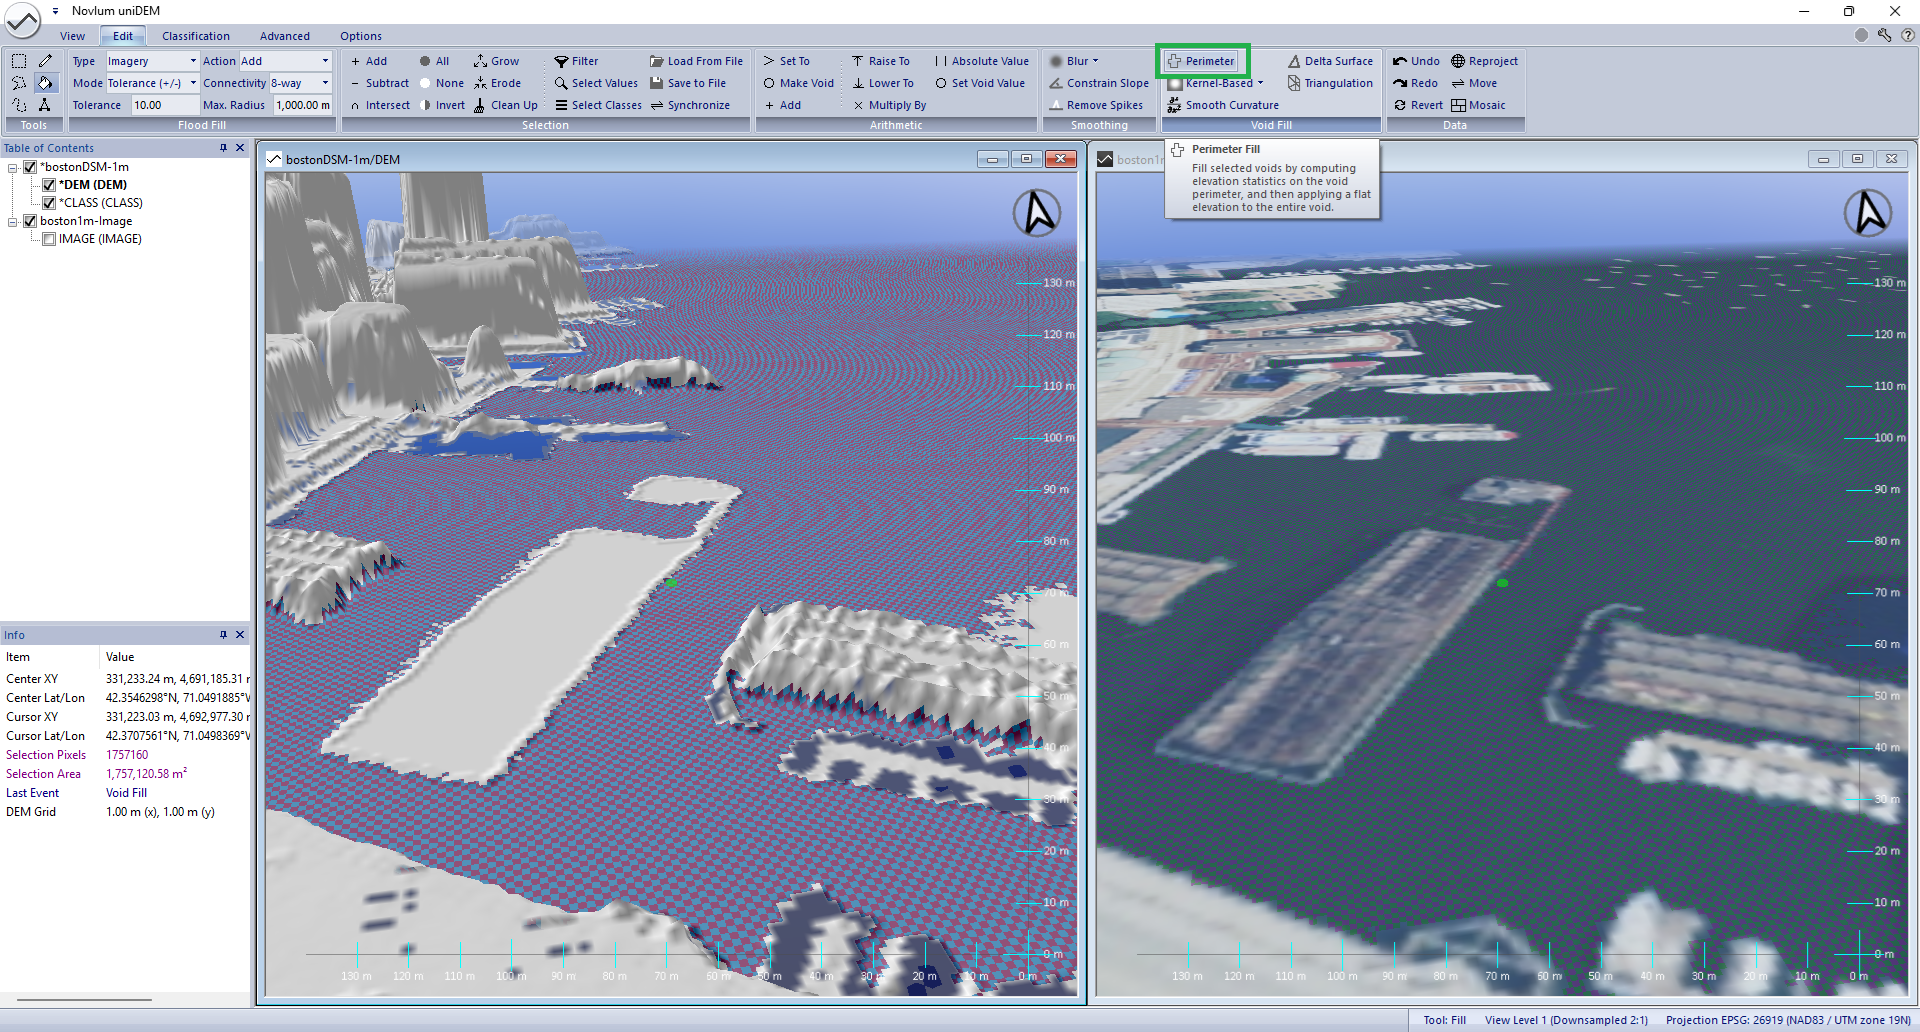
Set Water Height using Perimeter (Shoreline Heights)
- In the Classification tab click Select By Class
- Select the bostonDSM-1m dataset
- Select Ocean (20) classification
- In the Edit tab in the Arithmetic panel, click Make Void
- In the Edit tab in the Void Fill panel, click Perimeter
- Click OK to user Percentile algorithm
- Enter "10" for the elevation percentile to use for the shoreline
- Click OK to "Fill all voids" including edges
Observe: Observe each discrete water body is set to an independent elevation
based on the height of the 10
th percentile of the water bodies shoreline heights.
Help references:
Select By Class |
Set To |
Make Void (V) |
Perimeter Void Fill
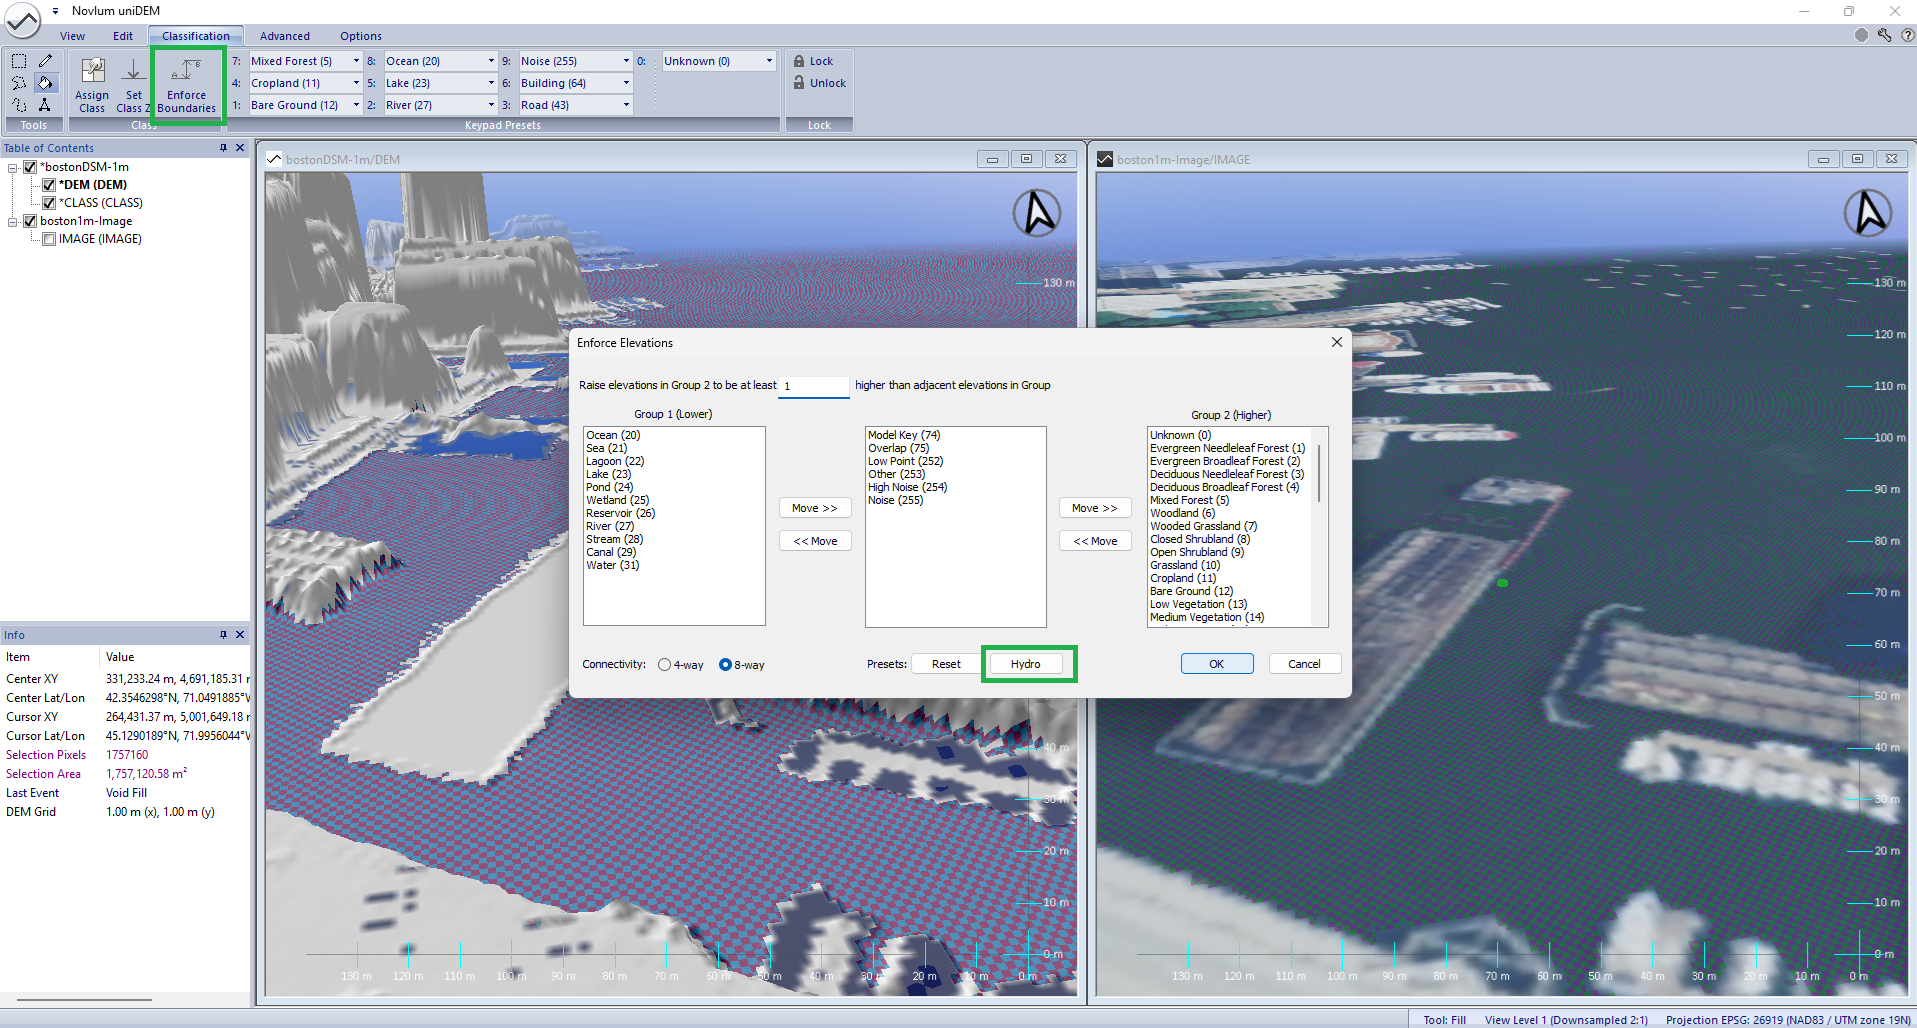
5. Adjust Shorelines
Many derivative products such as Contours and flood modelling require land to be equal to or higher then neihbouring water pixels.
- Press Ctrl-A to select all pixels
- In the Classification tab click Enforce Boundaries
- Enter 1.0 raise all elevations by 1.0m in Group 2 (land types) is lower than Group 1
- Click Hydro to separate groups 1 and 2
- Hit Esc key to clear the selection mask
Observe: All pixels that are of classs Unknown are now equal to of above the height of the Ocean
Help references:
Select By Class |
Enforce Boundaries